Showing posts with label craft club. Show all posts

Sunday, July 10, 2011

Craft Club 2011

This was our third year of having a summer craft club and  by sheer numbers it's definitely our most successful year yet.  We ended up with a full group of 5-6-year-olds, another full group of 7-8-year-olds, and two full groups of 9-10-11-year-old girls.  While I'm happy that so many girls are able to participate this year and especially that Ellie gets to be with girls her own age for the first time, I did end up a little disappointed that I couldn't keep all of the girls Emma's age together in one group. 

We hosted the first meeting for Ellie's age group at our house and I enjoyed seeing first-hand the fun they had together.   Since about half the girls were from church and half the girls were from school, I was a little nervous that they would separate themselves into groups, but it turned out fine. 

We had an ice cream theme for the day, so we started off by making sand-art ice cream necklaces

Then it was cute to see their little wheels turn as they used their creativity to make design-your-own paper dolls (holding ice cream cones to keep with the theme).  We made them using foam bodies,  scrapbook paper for clothes, buttons and glitter for decorations, yarn for the hair, googly eyes, and whatever else they felt like using. 


After those crafts, we went on to the highlight of the day...making our own ice cream!  We followed this recipe for Ice Cream in a Bag.   The kids were excited to give it a try and especially loved a quick jump on the trampoline to keep the bags in motion. 

In the end, they had cold hands and limited patience, so we just decided to open them up and eat them as they were.   Some were thick and creamy, as they should have been....


While most of them ended up more like ice cream soup....


Of course it was nothing a few sprinkles couldn't fix...

 All in all, it was a fun day and definitely worth all the stress of figuring out the dynamics of getting the groups started. 

Coming soon....a post about my girls' hairstyles in the summer vs. the school year.   Er, never mind.  I forgot where the brush is. 


**************************

Tuesday, August 24, 2010

Grassheads

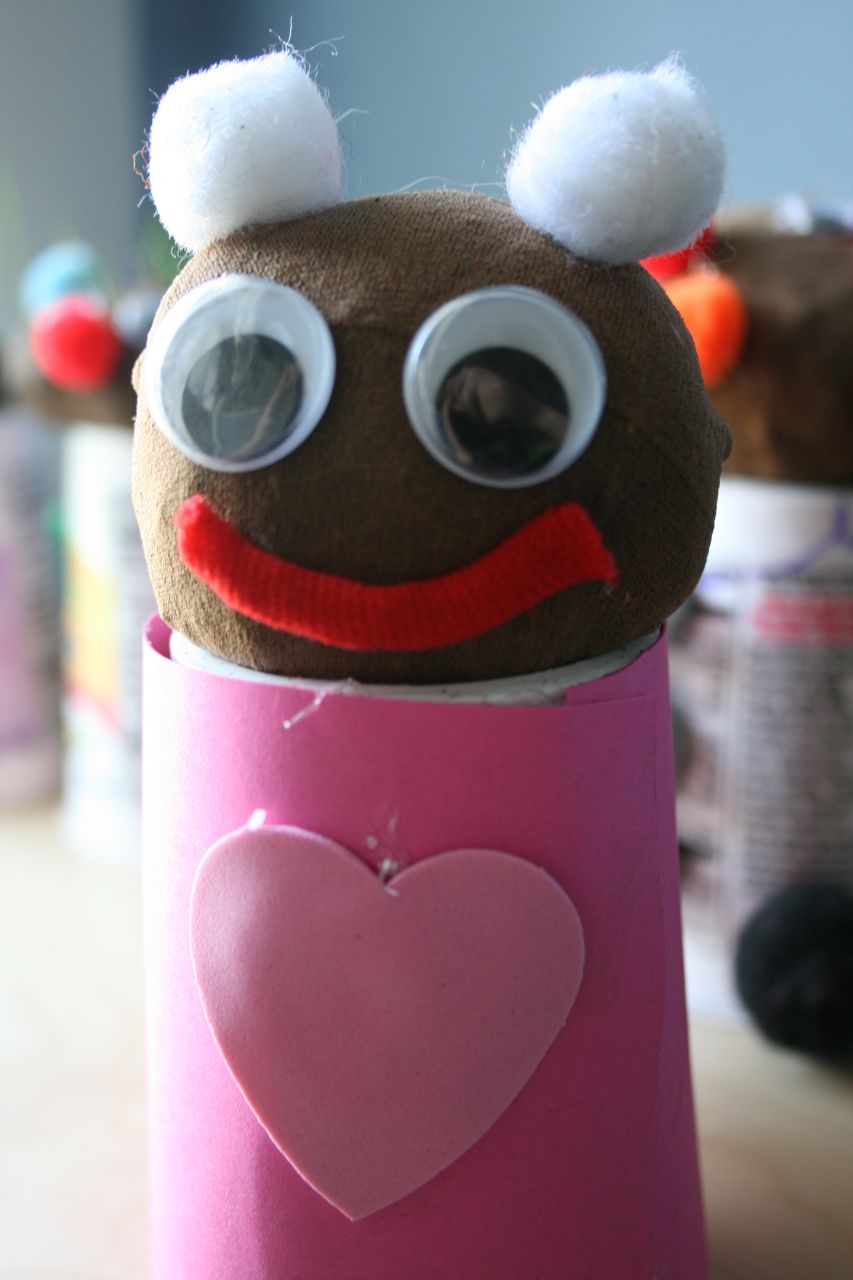
This is my kind of craft all the way.  It's cheap, fun, and my kids get to get their hands dirty!  We made our first Grassheads about 1-1/2 weeks ago after seeing it online at Scribbit and then "borrowing" some grass seed from a nice friend and since then my kids have made them twice more.  Good thing they're cute, because I'm pretty sure that they're going to keep on making these until the grass seed runs out. 
The ingredients:
old nylons (or cheap knee highs) cut off at the ankle
small craft pompoms
medium sized googly eyes
hot glue and hot glue gun (Ignore the picture with the craft glue.  It didn't work well as well with the moisture)
dirt

yogurt container (Yoplait works best due to its shape with the smaller opening)
grass seed


Cut off old nylons at the ankle (make sure there are no holes in the toe): 

Add about 1 tablespoon grass seed: 


Fill with a couple handfuls of dirt and tie off the end with a tight knot.  NOTE:  Do NOT trim the "tail".  The tail is an important part of how this craft works:

Place it into the yogurt container with the tail hanging down.  Shape the head to make it fit snugly on top of the opening (the head is very pliable at this point).  One of my kids didn't do that and ended up having it fall in ( I actually think that  this picture is of one that fell in, so make yours a little wider than this). 

Hot glue googly eyes and pompoms as desired (I tried to get them to avoid making the face on top of the grass seed, which is easy to see through the nylon).   Some of my kids went crazy here and glued several eyes on to make an alien.  Pompom ears and tails were popular too. 

You can even decorate the yogurt container if you want (take the grass head out first) 


Fill the yogurt containers about 1/2 way with water, making sure the "tail" is submerged.  This "tail" will act as a sort of straw sucking up the water for the whole head.  Check the water levels every couple of days or so refilling when necessary.  

You do not need to water the top of the grass head.  All the water it needs will be sucked up through the "tail" hanging into the water.  It will take a couple of days before you notice moisture on top of the head.  They sprouted after 4 or 5 days and a week later they looked like this....
Almost ready for a "hair cut".

************************

Wednesday, August 18, 2010

Perler Beads: A Love/Hate Relationship

If you haven't been able to tell by now, I enjoy crafts.  I enjoy doing them myself and I also enjoy finding crafts for my kids to try.  This post is dedicated to one of our all-time favorite kids' crafts--perler beads.   

Most of you may already be familiar with perler beads, but since they've provided hours and hours of entertainment for my kids over the years, and this summer in particular, I thought I'd share a little more about them.    

 First, you can't beat these beads in the easy, cheap, or cool department.    Here's a visual I found that summarizes what they are...

You can find these in buckets or packages at the craft store or on Amazon .  Make sure you get a kit that includes the beads, a pegboard or two, and the ironing paper. Here are a couple I like (here and here ).   I usually use my 40% off coupon and buy it at Michaels, but I like the convenience of getting it online sometimes too. 

Once you have the kit, 1) you choose a pegboard, 2) fill it with the beads in whatever pattern you choose, 3) then place the ironing paper over it and iron the top side, and lastly 4) flip it over and iron the back. 

The beads melt together slightly and you end up with a super cool creations like this small sampling of what you can find at our house.  .

You can put a magnet on the back and hang it on the fridge.  Tie a string through it to hang on a tree.  Or just keep them in a box and play with them.   

These little beads are tiny, which means they're great for developing eye/hand coordination, but because of they're so tiny I do recommend waiting until your child is about 4-years-old before introducing these.  They're also great for teaching kids about patterns, following directions, and sharing. 


Emma, Adam, and Ellie have literally spent  3+ hours a day some days creating, trading, and sharing their bead creations.  It's actually to the point now, that I've even let them start ironing by themselves, since it was becoming quite interruptive to my day to continually be called in to iron for them.  I figure I'll wean them slowly from here into ironing all their own clothes.  :)

And here's the only thing I don't like about these beads....

Coming soon:  A spreadsheet and a mock....

Wednesday, August 11, 2010

Starting Your Own Kid's Craft Club

 Since a few of you seemed like you may be interested in starting your own kid's craft club, I decided to summarize (as much for me as for you) how to get one going.  We've done it as a summer activity, but you could definitely keep one going during the school year if there was interest.  You can do this with boys or girls and any age 4-11, as long as the crafts/activities were appropriately picked for the right age.     
 

  It does take some organizing and a bit of benevolent dictatorship to get moving with this, but  it's been so worth the effort to see the kids trying fun, creative ideas and developing friendships at the same time.  We made participation in the craft club free of charge, other than the supplies you provide when it's your turn to host. 

Here's how to get started:


1.  Make a general plan of how many kids you want to include and how often you want to meet.  (My suggestion is 6-8 children of similar age and meeting once a week).

2.  Invite people.  Tell them what your plan is and give them a deadline to respond.  This is also a good time to ask them what days/time will work out best for them.

3.  Based on who wants to participate and the days/time that they're available, pick an official day, time, and length.  (We ended up with Wednesday afternoons for 3 hours).    Please note that it may not be possible to accommodate everyone's preferences.  Go with the majority and if it doesn't work for someone, they'll either need to change their plans or they may not be able to participate. 

4.  Make a calendar of the dates (we had 8 participants, so I just calendared 8 Wednesdays in a row) and have people sign up for a day to host.  I did this by email and had everyone "Reply All", so that they could see which days were taken.  There was some trading around that happened later, but that was much easier to do once it was on the calendar initially. 

5.  Have people submit their craft ideas as soon as possible to be included on the calendar.  I did this so that 2 people did not plan the same craft unknowingly.  I think it also was inspirational to see other people's ideas.

6.  Be realistic.    Keep in mind the ages of the children when planning the crafts.   Younger children may have difficulty with some fine motor skills (like detailed cutting or tying knots). 

7.  Be flexible.  Be prepared for time fillers should the craft take less time than you'd expect.  ( I often planned a secondary craft while other moms would have them play outside).  Also expect that each child has a  different threshold for attention.  While it's fine to encourage a rushing child to slow down and take their time or remind a more detail oriented child that craft club is ending soon and they will need to wrap up, just don't criticize.  Kids are different and that's okay.  If two kids finish quickly and run off to play, it's okay.  Remember it's all about friendships and fun, which brings me to my next point. 

8.  Keep it lighthearted and have fun.  Remember that fun and developing friendships is what it's all about.    One of my crafts was really difficult for some of the girls, in particular my own daughter.  As her frustration level rose, I found myself starting to get a little irritated.  I had to remind myself why I was doing this in the first place and it helped me to be more patient with her and the others who were struggling.   

Coming soon a post filled with cheap, easy, fun craft ideas. 

Thursday, July 29, 2010

Mary Poppins Convention?

No.  It's just the summer craft club.

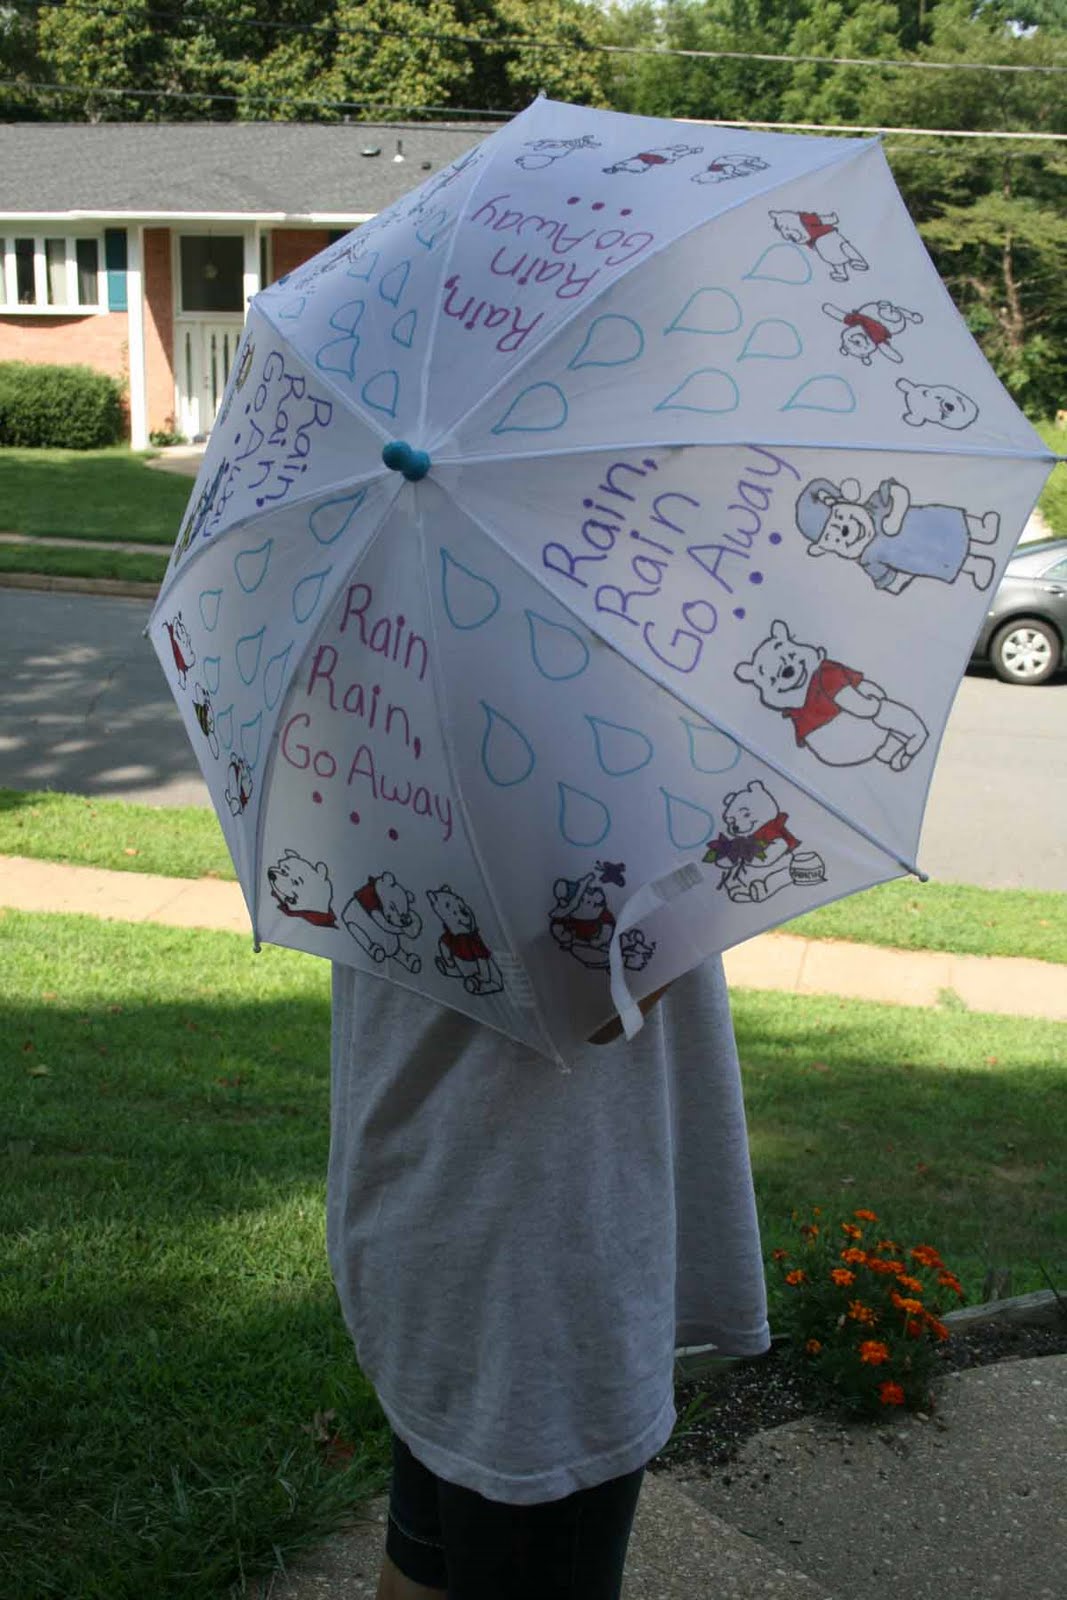
 Every week a different mom hosts the club, providing a craft or two for the 8 participating girls.  This is one of the projects we did at our house.  They traced simple drawings on to these cute umbrellas I found at Oriental Trading Company and then they colored them in with sharpies. 

They had fun and took their time making their own one-of-a-kind umbrellas.

Here's a close -up of Cami's Pooh bear version.

And my favorite panel of all, done by one of the girls.  It cracked me up every time I looked at her umbrella.


The girls have also tie-dyed t-shirts, painted birdhouses, made truffles, made beautiful bracelets, made necklaces out of ribbons and washers, and hand painted silky butterflies, and still have four weeks to go.

In the meantime, Emma is developing new friendships and experiencing first-hand the sense of pride and accomplishment  from creating something beautiful.

It really is a beautiful thing.  

********************* 

google analytics